Monday, January 13, 2014

All the crap that needs to get done

We have a LOT of things that needs to happen before the baby gets here.  Well, technically before the baby is ready to move out of the co-sleeper.  So that buys us a few more months.  Luckily.

The plan is to move L.Soup into what is currently the computer/craft room.  Preferably before we are ready to move the baby into the nursery.  That means we have to move all the of disastrous mess stuff from that room into the other spare room above the garage. 

I wish that we could just move her into that room, and not have to shift all the rooms around, but I'm worried that if one of us has to run out after L.Soup is already in bed for the night, the noise from the garage door opening is going to wake her up.  Its fairly loud when you're in that room and the garage door is moving.  So that idea got nixed.

THAT room is currently full of about 8 million baby clothes.  I wish I was exaggerating.  My dearest sister dumped gifted all of her kids clothes to us when they were done with them.  I've spent the last few months slowly going through the 22 trash bags that arrived at our house and organizing them into large storage boxes.  I'm almost done.  Once I found out we were having a girl, I focused more on finishing up that stuff so it was well organized and mixed with what I had from L.Soup.  The boy stuff has kind of been brushed to the side and I need to focus back on finishing that up.

Once all the clothes are actually organized, they need to be moved up to the attic.  At least all the boy stuff.  Some of the girl stuff can stay down and get put out in prep for our new girls arrival in April.  Before anything can go up into the attic, we need stairs to the attic.  The builder grade attic access (which is in our closet) is a joke.  Even if the floor of our closet wasn't covered in shoes (whoops) the hole is just big enough for an adult to shimmy through, there's absolutely no way any kind of storage box is fitting through it.

We are looking into something like this.  D.Soup still has to get up in the attic and make sure it's possible place everything where we want, but if so we will have ladder access in the hallway heading into the laundry room.

Let's recap:

  1. Cut gaping hole in ceiling.
  2. Replace gaping hole with attic stairs.
  3. Create flooring in attic.
  4. Finish organizing 8 million baby clothes.
  5. Move boxes of baby clothes into attic.
  6. Clean out room over garage completely.
  7. Move computer/craft room into newly cleaned out room.
  8. Create awesome new room for L.Soup.
  9. Move L.Soup into awesome new room.
  10. Move baby into nursery.
All before October (ish)?  With a 2 year old and a newborn.  Cake.

Ha.

So obviously, once the shelves are finished in the laundry room, that project is getting put on hold for a little while so we can focus on some of these steps.


Help.

Monday, January 6, 2014

My only Christmas craft

My in-laws (almost jokingly, I think) asked for a new mailbox for Christmas this year.  Something that represented them better than the falling apart mailbox that they currently have.  I thought about buying one already made for a little while, but decided I would try my hand at it instead.

D.Soup's family loves anything Disney, so I knew that was the direction I would be going in.  I found some cute images that expanded nicely (they are about 7 inches tall I think) and got everything ready in Silhouette Studio.  I purchased some black vinyl (how did I not already have black!?) and some clear printable vinyl for the characters.

I had purchased red and orange acrylic craft paint about a month ago for a project that never ended up happening with L.Soup.  I guess that will be a present for everyone next Christmas.  At least we have a whole year to get it done now, yes? 

The only other things I needed were a mailbox that I had D.Soup pick up at the hardware store one day, and some sponges which I stole from my mom's crafting supplies.

Here's the finished product (PLEASE ignore the disgustingness of my craft room, ugh):

Super fancy star because I didn't ask if they were okay with their name being on here
Other side
Front.  Same deal.
After everything was done drying, I had D.Soup put a few coats of clear UV protectant polyurethane over it.  I was standing with him for about one second as he was spraying, and then had to run away.  I really appreciated his help because I never would have gotten that done.  That stuff is stinky!  And I'm not supposed to be around fumes like that, while I'm growing another person and all.  

Overall I'm super happy with how it turned out.  It didn't really take that much work.  I'm a little unsure about how the printable vinyl stuck to the mailbox.  There was one section on Mickey's arm that seemed to not stick as nicely as everything else.  D.Soup's mom asked when we were coming to install it, so I guess I'll check out that arm when we go over for that.  make sure it's up to standards and whatnot.

His mom was super excited about it.  She asked where we got it from.  Always a good thing for someone to think your work is professionally done. :)

I sent the pictures to my mom and she thought I should make and sell them.  And then I laughed, because who has time for that??? 


I'm trying to decide what I want on my mailbox.

Thursday, January 2, 2014

Next Project

  1. Find antique TV stand and refinish it.
  2. Build bed frame.
  3. Build matching night stands.
  4. Refinish dining room table.
  5. Refinish bedroom furniture to match bed and night stands.
  6. Build computer desk for D.Soup.
  7. Refinish wing back chair.
  8. Build floating shelves.
  9. Build outdoor planters.
  10. Install cabinets with clothes folding space into laundry room, with cat door.
  11. Paint L.Soup's bedroom.
  12. Paint foyer.
  13. Sew pillow for L.Soup's bedroom. 

First and most importantly:
Happy New Year!!


I'm so happy my energy, willpower and motivation are back!  I'm ready to get back to work on the house.  Especially now that the foyer is done! Woo!  I don't have to feel guilty starting a new project when that's still sitting around sadly.

D.Soup and I decided that for Christmas this year we would work on getting some of the stuff in the house dealt with, instead of buying each other presents.  We have a lot of plans for this house, and haven't made much time to get anything done (obviously, see list above). 

For the last our laundry room has been a wealth of unused space.  We threw the washer and dryer in there, along with any laundry and cleaning supplies would fit up on the single wire shelf that came pre-installed.  We also hid the cat's litter box in there.
Hate this mess.

Of course I waited until the work started to take pictures.


Gross

It's a mess.  There's litter all over the floor (gross).  I can hardly reach any of the stuff on the shelf.  There's no where to deal with the clothes once they are finished in the dryer, which means they end up piled up in our room until we deal with them.
 
Originally our plan was to purchase a ready to finish cabinet to put in the open space and hide the litter box inside, and a cat door for them to have access to it.  My only worry was that the prefabbed cabinets would be too small for the litter box that we have. 


As I was perusing the internet one day, I came across this.  I immediately knew that this would be such a better route for us, and sent it to D.Soup to look over.  Now the plan is to have two counter tops, one over the washer and dryer, and one in the opposite corner over the litter box.  That counter will get the curtain treatment, to hide what happens in the litter box from sight.  

The other change is that the laundry room door will be getting a cat door on it.  That way it can stay closed all the time.  L.Soup will be moving to the room closest to the laundry room within the year, and I don't want any late night laundry running to keep her awake.  Having the ability to close the door completely should help with the noise problem.

Another addition to this room will be wall cabinets!  I hate wire shelves, especially ones that are way to high for my short self to reach without excessive stretching.  A set will go over the washer and dryer, and another over the cat box.  Storage everywhere!

I found this great stencil that I also have big plans for. I ordered it, along with a stencil brush and can't wait for it to arrive!  

We got started putting the braces up for the two shelves while we were off work after New Years.  We discovered L.Soup is NOT a fan of the drill.  She threw an absolute fit every time it started up.  That was fun.  So far this is our progress:
First board up!  Another one runs down the wall on the right, but I forgot to take a picture.
After we got the two boards up for this corner, D.Soup grabbed the actual shelf piece, so we could see how it looked.  He sat it on the brace, and said "Well, good news and bad news..."

Good news, is it fits... Bad news, our room isn't square!  What the heck!  So it looks like this:
Rude.
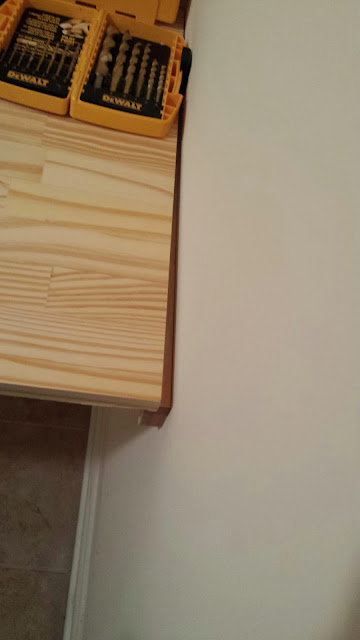
We are going to get some trim and cover that mess up...Then we have to figure out what we're using for a leg on the side that's not butted up against a wall.  That's on my to do list.

We came across the same issue with the other walls too.  Above the front of the washer and dryer, the distance between the walls measures 76.75", but in the corners it measures 76.25"!  That was fun for D.Soup, who cut the board you see below at 76.75" while in the basement.  He then had to run the stairs 4 times to get it cut the correct length.  He was planning on just cutting and eighth of an inch each time, then wised up after the third trip down two flights of stairs and measured the distance between the walls in the corner.
 
Boards up around the washer and dryer!
Next step is to cut the boards for the top so they fit around the tubing you see on the left hand side.  We also now have to take into consideration the change in distance and make sure to cut the boards on a slight angle so we don't have another huge gap.

I bought a little flip top trash can to go on top of the counter over the washer and dryer for dryer lint, which is much better than it just sitting on top of the dryer like it normally does (as you can see in a few of the pictures).  I also bought a glass canister to put my new powdered laundry detergent in.  I've never used powdered before, but I like the brand (I've used the liquid for the last 2 years) and it should last FOREVER, since I bought this.  So now I have a pretty place to store it.

Obviously I'm pretty excited about this getting done so quickly.

The cabinet part of this deal might not happen as fast, but I'm okay with that.  We decided to use these plans from Ana White and build our own cabinets:
We'll need 2 of each of the wall cabinets, and 1 base cabinet to squeeze in between the washer and dryer.  To purchase the cabinets that we need, it would cost us well over $400.  If we build our own, it will cost us around $200 according to my calculations.  Making them ourselves also allows us to tweak the sizes slightly so they fit perfectly in the spaces.  Also, I'm completely okay with it taking a little longer to save that much money.


Heck, I'm still sleeping on a mattress on the floor.
So obviously I don't mind waiting,
and not paying out the wazoo for something.

Monday, December 30, 2013

8 months later

We were cleaning up for having people over during the holidays.  I figured this would be a good time to remove the last of the decorations from L.Soup's first birthday party.  In April.

....It was only 2 things.  The Happy Birthday sign I had made as part of the decorations, and a small section of our living room wall dedicated to pictures of her from each month of her first year.

I had been fighting taking them down.

I mean, who doesn't want a wall shrine dedicated to their infant baby who is now a walking, talking, almost 2 year old machine?  That was the hardest part.
Before
After

I gently removed all the pictures from the wall and folded the tape over so that it was not visible.  Just incase I wanted to save them.  Forget about the fact that they were just printed on regular paper.  Or the fact that the pictures are all saved on my computer and I can easily print them again whenever I want.
Before
After

I had D.Soup pull the sign down.  Because I'm short and shouldn't be climbing on the couch trying desperately to reach the little Command hooks that were holding the sign up.  (PS.  Those things are awesome for party decorating!)  I carefully folded it up and put it with the pictures to be stored away somewhere.

So the walls are clear.  I'm not sure if I'm happy or sad about that fact.  The first night was definitely a sad moment for me.  But mid takedown I turned to D.Soup and said "I'm thinking..."

D. Soup:  You're thinking you want to paint what?
Me: How did you know I was going to say that??
D.Soup: You always want to paint something.
Me:  Well I'm thinking about chalkboard for this little section of wall.

So there might be another project looming in my future.  After Christmas.  And New Years.  And everything else that I've already got on my list.


Aka Never

Thursday, December 12, 2013

Our new foyer!

  1. Find antique TV stand and refinish it.
  2. Build bed frame.
  3. Build matching night stands.
  4. Refinish dining room table.
  5. Refinish bedroom furniture to match bed and night stands.
  6. Build computer desk for D.Soup.
  7. Refinish wing back chair.
  8. Build floating shelves.
  9. Build outdoor planters.
  10. Install cabinets with clothes folding space into laundry room, with cat door.
  11. Paint L.Soup's bedroom.
  12. Paint foyer.
  13. Sew pillow for L.Soup's bedroom. 
MONTHS ago (literally, months.  JUNE.  ugh), I decided to finally start working on some of the ideas I dreamed up for our new house.  I got all the supplies together, taped up the wall in the foyer, and started painting.  And then I ran out of paint.  So we went and bought more.  That next day.  Because I was motivated.

And then I got caught up in some other projects.  And we went on vacation.  And the dog's leg got busted.  You see where I'm going with this.  So our entryway has been in this awful messy limbo state ever since.  And because its a disgusting mess, we just keep adding to it.  Because that's the type of people we are.  Not the "oh I see a mess, I should probably fix it" people.  No, we are the "oh, well this is already messy so it won't really matter if I drop these other 54 things here too".  *sigh*


Well it got old.  And I got motivated.  AGAIN.

I didn't think there was much more to do to the base layer.  Just some sections that didn't have enough of a coating the first time around.  But I ended up doing an entire coat on the wall, because I kept finding sections that were just not quite covered.

Once again I realize how terrible a painter I truly am.  I don't know why I enjoy painting so much.  I actually dripped paint all over the floor this time around.  Lucky for me they are hardwood.  Had to do an emergency stop and run to get cleaner and paper towels to deal with THAT.  On top of that I hit the connecting walls a few times.  I used a magic eraser to clean up the mess, and it seems to have done a fairly good job.  I've never been a real fan of them, but it saved my butt this time around.

I also used D.Soup's recommendation and covered my paint tray with some plastic wrap before I poured the paint in, for "easy cleanup".  It was HORRIBLE.  I don't know if I didn't use enough plastic wrap.  Or if I'm just an idiot.  Or if it's just a terrible idea (I vote this one).  But the plastic wrap ended up balled up in the bottom of the tray, after I fought to get it to stay while I was getting paint onto the roller.  I was very bitter towards it, and ended up abandoning the idea all together.

After that debacle, I finished painting and let it sit overnight to dry.

Once the base layer was dry, I started taping over it in 9 inch horizontal stripes.  I had to get D.Soup to help me, since my arms are only so long.  We tried a few manners of getting the lines straight:
  1. When I was working alone, I marked ever foot or so with a pen down the wall, and then taped.
  2. D.Soup decided that was an epic waste of time and brought out the laser level to get an estimate of where to put the tape, and then we double checked it before we stuck it down completely with a regular level.  
  3. Then we got completely tired of re-sticking the tape when the lines ended up 100% not straight.  So we dug out the chalk line and things progressed much faster after that.


In between steps 2 and 3 is about 1-3 months of ZERO activity.  We attempted to get some progress made on the stripes one Saturday while L.Soup was napping, and ended up waking her up from her nap and dealing with a crankosaurus the rest of the day.  So that got nixed fairly quickly.  THEN, I spent at least a month of that time as a semi-permanent feature on the couch because of fetus induced exhaustion and nausea.

Well, I'm out of my pregnancy coma now, and ready for action!  Tuesday, I took advantage of a snow day and a toddler that's more interested in helping than destroying at the moment and we finished up the taping!  I then marked which stripes I was NOT going to paint so I wouldn't get completely confused in the process.  Because let's be honest... that would happen.


All taped up!

I've always had a hard time with paint seeping underneath the tape, and I wanted to make these lines as perfect as possible.  I started off with burnishing the the tape so that it was nicely stuck to the wall.  But I wanted to do more.  I read a really great post once about how to prevent the paint from seeping, and I wanted to give that a try.

After you tape, paint (on the side you intend to paint the new color) the SAME color as the wall.  This first round of paint creates a barrier with the tape.  If any paint ends up running, it's the same color as the wall, so you won't see it!
In my case, the paints were the same color, but different sheens.  I used a bristle brush and put a thin coat of the flat paint over the side of the tape where the high gloss paint would be.  I fully intended on taking a picture of it, but my cell phone battery was way low and I plugged it in to charge and completely forgot about pictures until it was too late.  Of course. 

Allow that to dry, THEN paint the new color.  
For this round I used a roller, and carefully painted each stripe with the high gloss.  I had D.Soup help me with this part, mostly because the high gloss paint isn't no VOC, and it was stinky.  I was worried about being in the room with that smell for too long, so he did the first round of stripes for me.
At this point I started looking at the tape and getting really nervous because it looked bubbly.  After all the work on taping the lines, and then all the effort I put in to NOT have the other color seep through, I was starting to panic.  I gave the paint a little time to dry and then ran over and started tearing at it like a mad woman.  Of course by this time, it was 11 pm, and D.Soup was like "we're not removing all of this tape, are we?"  But then he realized I meant business and got to work.  We had a few mishaps with the tape pulling up paint around the edges of the wall, but what do you expect from something that's been sitting in the same position for 6 months?

So finally.  Finally, Finally, FINALLY!  Here it is:

Subtle
Finally putting the hallway back together!
A little Christmas decoration.

Voilà!

Tuesday, November 12, 2013

A little one on one time with the sewing machine

Months ago I bought two sewing patterns off etsy, this and this.  I sat down almost immediately and got to work on the skirt.  I had to make it big, so L.Soup hasn't had the chance to wear it yet, but it's so sooooo cute.  Of course at the time I had no idea where my camera was, so I didn't take any pictures of the process.  I do remember it involved the destruction of an old pair of very loved jeans that were unwearable.  It still hurt to cut them up.

Since then I've scored an awesome deal on denim fabric at the store one day and bought a ridiculous amount of it so I will never have to suffer through an experience like that again.

About two weeks ago I decided it was probably time to get to work on the other pattern, a coat.  My intention is for this to be L.Soup's winter coat for this year.  So I've put myself in a slight time crunch.  Lucky for me the pattern is really simple.

I picked a plaid fleece for the outside and a red swirly flannel for the inside...

I got half of the fabric cut out, with "assistance" one day while I was at my mom's.  I decided to wait until said assistant was asleep to try to cut anything else.  Then I had a week of not feeling well and general exhaustion, so nothing got done.  Well last night I decided it was time.

I sat down and cut the rest of the fabric.  On the floor.  I need a second table.   Then I got to work.

Wednesday:
I got the main pieces together for the outside and the lining.  I also finished the ruffled collar and got all of that sewn together.  (ps I didn't take any pictures of this entire process.  I am the worst)

I wanted to see what size the belt would be before I made button holes, so I started on that before I moved to the real next step.  I used the fleece and flannel and followed the instructions for putting the belt together.  But about halfway through I noticed the belt was curling.  First and foremost I want to say that fleece is nearly impossible to sew with (for me at least) because it is so stretchy.  It's also completely impossible to fold under 1/4 inch and sew.  So I think what happened is as I was ATTEMPTING to do that, I stretched the fleece out.  As it got sewn to the flannel, it tried to go back to normal, and that caused the curling.  I'm going to start over with two pieces of the flannel instead and run with that.

After that debacle, I started working on holes for the belt to go through.  I got one made and then realized it was after 10 pm.  And because I'm a 90 year old woman I immediately shut everything off and went to bed.

Thursday:
After putting L.Soup to bed I got right back into the swing of things with the coat.  I finished up the holes for the belt, and got the seam sewn around the bottom of the coat.  And I almost died from the cuteness.  I took two of my KAMSnaps and buttoned up the top.

Then I got to work fixing the disaster from the night before.  Luckily I always buy waaaayyy too much fabric for what I need (mostly because I never think to look at the pattern to see exactly how much I need before I go to the store, so that's always fun).  I cut two new lengths for the belt, both out of the red flannel and sewed them together.  SOO much easier than trying to work with a tiny strip of fleece.  Ugh.

I strung the belt through the holes, and had to talk myself out of waking L.Soup up to put it on her immediately.  Instead I ran into the bedroom and made D.Soup pause the hockey game to experience the ridiculousness.  He loved it.  I loved it.  I did a little happy dance.

I was so hyped up from the victory of the coat, I switched out the thread and threw a pair of Baby Legs together too!  I picked up a super cute pair of socks last month at Target, and just hadn't taken the time to do anything with them.  L.Soup will be wearing them today!

Speaking of wearing... When I went to get L.Soup out of the car this morning I had to fight the new coat on her.  Which isn't anything new...  She.looked.amazing.  I'm worried that it's a little short, but I should be able to fix that without much effort, I hope.  But then, after she got it off, she cried when we tried to put it back on her.  So that was awesome.  I tried the sad face and everything, and she just wasn't having it.  Sigh.

Finally got a picture of my little moving target:

No I will not look at you, mama.


Anyway.  Hooray for productivity!

Friday, November 1, 2013

Finishing touches to the nursery. Part 4: Final Product!

  1. Find antique TV stand and refinish it.
  2. Build bed frame.
  3. Build matching night stands.
  4. Refinish dining room table.
  5. Refinish bedroom furniture to match bed and night stands.
  6. Build computer desk for D.Soup.
  7. Refinish wing back chair.
  8. Build floating shelves. (almost)
  9. Build outdoor planters.
  10. Install cabinets with clothes folding space into laundry room, with cat door.
  11. Paint L.Soup's bedroom.
  12. Paint foyer. (almost)
  13. Sew pillow for L.Soup's bedroom. 
SO.  I was trying to wait until the last 2 pieces for this room were finished.  But its going to be probably Christmas before they are done and I can't wait that long for two shelves.  This post has been written for months and its killing me just sitting here.  I'll write about the shelves if they are ever finished when they are finished.

While I was pregnant, I dreamed up this nursery idea based around the bedding set I had purchased.  The rainbow of colors and blocks on the wall.  Well it never came to fruition in the old house because of the hobo.  So when we moved to the new house, I knew I wanted to make it happen.

We decided when we moved in that painting her room would wait until it was warmer out, so the windows could be open to air the room out a bit.  Well, I decided that March was warm enough.  I wanted her room to be done before her birthday, and that was that.  D.Soup wasn't very happy with my decision, but he wasn't the one doing the work.  It turns out that it was a fantastic idea, because I got so warm while painting that I appreciated the cool air coming in through the window.

When we first moved in, before anything went into the nursery, I started taping.  Lower parts on the walls, door framing, some of the upper edges.  Then it just sat, and sat, and frustrated me beyond belief.  It was a good day when I got to tape the rest of the walls off and could get started painting.

Side note:  L.Soup's name is all over these pictures.  But I'm going to continue to call her L.Soup because I like it.  So there.

Before I finished taping though, we put up this super cute fan we found at Lowe's.  It can be white, or multicolored like we have here:
Finished expert taping job.


I had D.Soup help me measure height of the wall where the squares were going, and then match that distance on the wall width wise so that the squares would be... square!  He then left me to my own devices to take Little Miss somewhere and distract her.  She had not been very happy locked in the nursery with us while we were trying to get the lines taped up.

"Perfect" Square
It took me 2 (maybe 3, I can't remember) coats to get the walls covered.  All in all I'd say it took 2 hours to get the 3 walls done.  I was pretty happy with that.  Especially considering that included times where I had to take a break because L.Soup was banging on the door trying to figure out what I was doing and why I wasn't entertaining her.  Rude.


I let that dry a few days, and headed back in to do some more taping.  Because I'm impatient, in that interim some of the decorative pieces went up on the yellow walls.

Light switch matches the bed set.
Got these beauties at a huge craft show in the area
Mom and I took the coat rack, and turned it into a bow holder!  Obviously she needed it.  She's got too many even for this! The other little guy is hanging on the outside of the door on the handle.

Ridiculous
I again needed D.Soup's assistance for taping.  This time there was a little anger on both our parts, because he didn't understand what I was doing, and I didn't understand why he wouldn't just do what I asked him to.  But we got it figured out, and I got the squares all taped up.  We basically taped a straight line across the wall, then about every 2 feet I would have to tear the tape and start over, so that the corners connected.  It was never one continuous line.  I also had to incorporate vertical lines into this wall.  It sounds fairly confusing (it was) and its hard to describe.  Below are some pictures that should make more sense.  Luckily for me, I left every other square white, so I didn't have to worry about re-taping in order to paint the other squares.


This is how I figured out which color would go where.  I had a general idea in my head, but decided I didn't like it once I set the canisters that way the first time.  So I just moved them all around until I liked the way the colors looked in that order.  The space I was painting wasn't even 3 feet square, and these paint samples hold enough to do about a 4 square foot section, so I had a ton left over.  I used these same samples to paint the boxes so the colors match perfectly.


I've always had a hard time with paint seeping underneath the tape, but I think it did a fairly good job this time around.  I wanted to try using this method, but I didn't have the original color of the wall so I couldn't do it.

I worked as carefully as I could to not drip, and I did a pretty good job.  I had a few mistakes, but I also had a few places where the tape ripped the wall! That was pretty frustrating.  But those are just some minor issues that you really can't see because they are behind the crib and overall I'm so happy with how it turned out.  And like I said before, I'm not the best painter... So I was expecting some of this.
Rude.
Paint drip
Paint drip AND its source
Speckling
Drying
Once the paint was dry and the furniture was moved back, I took some animal vinyl stickers that match the bedroom set and placed them around the room.  The boxes were in here at the time, but didn't match and it was starting to annoy me.  So I fixed it.

Wall with the inspiration for all this
Purple and Gray just barely visible at the bottom


Months ago I made pennant banners, but had yet to do anything with them.  I recruited D.Soup one more time, and he begrudgingly helped me hang two of them in the corner of her room over the dresser.  I made MANY more triangles, intending to hang these all over her room.  But 1. they were too much work and I had a very small very needy infant at the time and 2. I think the two are PERFECT:

The new shelves we are making will give me space to put up a few things that I've been holding onto.  I intend to move the name blocks that I got off Etsy to one shelf, opening the dresser up for some more decorations. 

When I was still pregnant, I spotted these on Etsy.  I immediately decided I wanted to make them myself.  I used my Cricut (since then I've invested in a Silhouette Cameo, and I love it so much more than the Cricut) to cut the letters and graphics out, and glued them to a piece of 8.5x11 card stock paper.  Each page has 4 different shades of each color.

I put them in frames with just glass, so you can see the wall behind the paper.  They are the perfect piece of art to hang above L.Soup's crib.


I also saw this before she was born, and so as soon as she was here I ordered one... it looks like the "Audra" one.  It will go on the second shelf if it ever gets done which is currently in the works.  That shelf was also supposed to hold the iPod and speaker that played L.Soup's music at night time. But that ended up not happening...
I LOVED this little speaker.  I ordered it off Amazon, and wasn't really expecting much from it.  But it was awesome!  And then... It died!  I was so sad.  I didn't order another one to replace it.  Only because she doesn't seem to be dependent on the music to stay asleep anymore.  On my recommendation my sister ordered two of them, but she said her's didn't last long at all.  So I'm not quite sure what the deal is with them.  Ours lasted almost a year.
One last picture of the fan, now that you've seen the whole room finished.

I would love to paint the inside of the closet too, but at the moment I don't have the time or energy to take all of her stuff out of there and paint it, let it dry and then put it all back.  I do have some ideas for better storage in there.  But every time I'm in her room, so is she.  She's a fantastic helper.  For unpacking things.  So I never get anything accomplished.


Hope you enjoyed the tour!