Showing posts with label Making our house a home. Show all posts

Monday, October 6, 2014

Starting from scratch

Things have been at a complete stand still in the Soup household the last few weeks.  We moved R.Soup over to her own room because she kept waking up at 3:30 in the morning to hang out with her mama.  No thank you my dear sweet baby love.

She hasn't been having a hard time going to bed.  Some nights she even sleeps all the way through to morning.  But then there are other nights where she wakes up multiple times throughout the night and I'm the only one that she wants to see.

I've spent the last few weeks trying to recoup from the the previous weeks when I was being allotted approximately 3 hours of sleep during the night.  

We've been making a point to go to sleep as soon as the girls are asleep, so that I'm not dying the next day.  Mess has been piling and piling and piling, and I haven't even thought about the projects going on in the basement.  On nights that we don't go to bed, we sit on the couch and watch some TV and hold our breath (well at least I do) waiting to hear crying coming through the monitor.

I finally broke down last week and invited people over to the house for a Sunday get together.  Which forced us to frantically clean the main level of the house in prep for them coming over.  I wouldn't care if it was a normal level of mess.  But this was hoarder style disgusting mess and was starting to affect my daily outlook.

So now the main level of the house looks... better.  Like 1000 times better but still not what I think it should look like.  But as long as we can keep up with this level of clean, we can work towards my dream clean.  Minus toys.  Nothing ever looks clean when its covered in a rainbow of baby toys.  Honestly I'm not (always) bothered by them.  Its the inch fine coating of sand under them that bothers me.

Upstairs on the other hand.  Disaster area.  Our old mattress is still standing up in the hallway outside our bedroom.  The cats have claimed it as their new climbing tree since its the highest place they can be.  I'm afraid at this point they might revolt when we move it out.  There's boxes of hand-me-down baby related things (mostly clothes... MORE clothes) that need to be washed and sorted.  I have a ton of things lying around currently that I want to put into the bathroom, but haven't had any time to actually WORK on the bathroom.

In addition to THAT - because that's not enough and I want you to truly understand the state I've allowed our house to get to - there's four... FOUR loads of clean baby laundry.  We also have one or two loads of our laundry.  We only have 4 laundry baskets. That means one of the "baskets" is dumped on the floor somewhere.  And the dirty clothes hampers are starting to fill up again.  It never ends.

Okay.  But enough about clothes mess.

Sometime in the last month, the light in our ceiling fan stopped working.  So the majority of the time that we spend in our bedroom we have to use our phones as flashlights and have the hall and bathroom lights on so we can actually see things.

D.Soup bought a kit to fix it the other day, but accidentally bought the ceiling fan kit instead of the light kit.  So now we are back at square one.

I think I'm finally finding a groove (and the energy) where - if R.Soup stays asleep - I can get things done.  I did what felt like a million things on Wednesday night when I got back downstairs.  I'm hoping I can keep that pace up.

Also, I need to be starting back over on an exercise regimen. Once I stopped sleeping, I stopped caring about my 30 day challenge.  Which is unfortunate because I had made it to day 14.  I'm going to start that back up here soon, and hopefully stick it out for the entire 30 days.  I'd also like to pick up with some "running" sometime in the near future.


Here's hoping I can get back on some kind of schedule soon.

Friday, August 29, 2014

Mattress in a box


We moved out of our old house right when RoomStore was going out of business.  It was perfect timing for us because we were in desperate need of a new bed, since we had trashed ours when we moved out of our old house and had spent the first few months sleeping on a deflated air mattress on the floor.  It was almost like camping.  Sort of.  Not really.

We ended up with a king size pillow top mattress that at the beginning felt like magic.  It was so soft, and comfortable.  And then a few months went by, and you could only sleep in two places on the bed because any time you moved anywhere else you rolled right back into the hole.  It was annoying, but we dealt with it because its ridiculous to buy a new bed after less than 2 years.

Like I said before, D.Soup was gone for work all last week.  While he was gone someone recommended the Sleep Innovations 10 inch mattress from Amazon.  They personally had purchased multiple forms of this bed and were very pleased with it.  That was enough to get D.Soup debating on making the purchase.  Once he got home and slept on our bed again - waking up in the morning with a sore back and knees after a week pain free - the deal was done.  That night he placed an order and Monday afternoon our bed was waiting for us when we got home.

What is that, you say?  That doesn't look like a bed?  Well don't be fooled....

That right there is a genuine king size foam mattress.

I wish I would have gotten video of this sucker opening up when we cut the vacuum seal open.  It was hilarious.  It reminded me of those little shapes you would get as a child and when you put them under water they turned into wash clothes. 

I don't know these people, and this is not my video.  But this is the mattress we ended up with, and they took the step that I didn't think of and recorded opening the mattress.  This is exactly how ours went too.

We a few nights in to sleeping on the bed.  More like "sleeping" for me, but D.Soup seems happy with it so far.  I got a better nights sleep the last few nights and I'm feeling pretty good today, so I'm happy with his purchase.


Now I just have to figure out what to do with the king size mattress in my hallway.

Tuesday, August 19, 2014

6 month recap

It's been so long since I've written here, everything is blending together.  So I'm just going to make a list of the things (that I can remember) that have happened over the last few months and quickly recap them.

1.  We finished getting L.Soup's room together

2.  We had a baby!

3.  D.Soup took L.Soup and his mom on a road trip in May.  My mother in law's best friend had a daughter graduating from high school.  They live in North Carolina.  She really wanted to go be a part of the celebrations, but didn't want to go alone.  D.Soup decided it would be fun to take L.Soup and spend some time with his mom.  He also thought it would be nice for me to spend some quality alone time with R.Soup.  It was definitely nice to have just one baby for a few days, but I was so happy when they got home.

4.  While they were gone my mom and I attacked the girls rooms, and the computer room.  We took advantage of having only one baby, and spent a majority of the 5 days they were gone frantically cleaning and organizing the upstairs in my house.  It had turned into a complete disaster area - all the girls clothes were in laundry baskets or on the floor, boxes were piled everywhere, things got carried upstairs and just left in the hallway.  A. mess.  And the worst part of everything was the computer room.  There was a single path of walking space in that room.  It took most of the time to clean, but we got it 95% accomplished.  I have big plans for that room in the near future.

5.  I went back to work.  I got an awesome 3 months at home with my girls after R.Soup was born.  I'm happy to be back at work, if only because I have adults to talk to again.

6.  I started making time to work on crafting/house stuff again.  It may only be an hour after the girls have gone to bed, but I'm sure soon I'll be able to devote more time to working on my crafting projects.  Currently I'm working on four crates - two for the girls bathroom and two for the bottom of the pantry in the kitchen.  More on that later.

7.  I decided to decorate my bathroom.  When we moved in, all the rooms in our house were the same color.  For the most part I'm okay with that on the main level.  Most of that level is one large open space so the consist wall color isn't terrible.  Upstairs though, every wall in every room is (other than the girls rooms) the same and it was starting to wear on me.  Additionally, I had put no effort into decorating the bathroom other than a few (black - what was I thinking) rugs on the floor and a pretty shower curtain.  I'm over it.


Hopefully this will be a good kick-off point for me to start writing here again.

Friday, August 15, 2014

L.Soup's New Room

When I disappeared, I was in the middle of clearing out the new space for L.Soup's room.  So I'm going to try to pick up from there.  Months of time have passed and I now have double mommy brain, so bear with me.

What had become a disastrous mess in that room ended up being an even more disastrous mess in the new computer room (a completely different conversation).  I finally got enough maternal nesting into my system that I got myself in gear and motivated.  We moved the rest of the stuff out of L.Soup's future room.  But the only place (other than the trash) for it to go was into the new computer room.  At this point I didn't care, it was time to move.
Before

Months ago, during a trip to the fabric store, I found this cute white curtain fabric with blue, pink and green circles all over it.  It became the center piece for all decisions made about the bedroom.  Interestingly enough, the curtains have not yet made their debut in L.Soups room yet.  I'm working on it.

<picture of fabric>

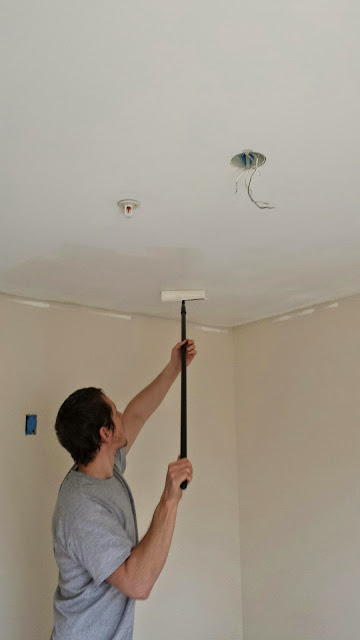
Once we had pulled every last piece of mess out, we made a trip to Home Depot for paint and supplies.  All the walls in our house were a bone color when we moved in.  Considering I was putting white furniture into the room, I didn't want the walls to look dirty.  So the walls and ceiling in L.Soup's room got a fresh coat of white satin paint (for easy dirty removal, which has come in handy more than once).  I had D.Soup help me with the ceiling, but I did most of the walls.  We left the trim alone because it actually didn't look bad once the white paint was up (its also a bone color).

After
I then took pink, green and blue paint and painted three different size circles onto the wall.

<color names?>


I snagged my old dresser from the basement at my parent's house...
D.Soup doing some sanding
(One of the feet on the dresser had been severely damaged over time, so we took some wood filler and basically created a new leg for it.  I wish I would have taken pictures of it in progress, but I guess I forgot.  Pregnancy brain.)
Gnarly foot from water damage

...and spent some time painting that white with pink, green, and blue dresser drawers.  I also covered the top of the dresser with some wallpaper that matched the color theme as well.  I have the mirror that goes with this dresser as well.  But I figured L.Soup doesn't really need it just yet, so I can hold off on that for a little while.
White drawers before taping and painting the colors
New hardware from Home Depot
Disney Kids Paisley Stripe Wallpaper


We also picked up this ClosetMaid Cubeical from Target, along with some color matching storage bins for books and trinkets. Her shoes go in one bin, bathing suits in another.  At the moment most of the bins are empty, but that's a good thing.

Once all the painting was finished, we headed out and got L.Soup her very own BIG GIRL BED!  Her twin size mattress is currently sitting on the floor, which is probably for the best because she continues to fall out of it on a regular basis.  We made a point to pick out some fun sheets for her, to help convince her that the big girl bed was the place to be.  It was actually a lot easier than I thought it would be to transition her to the new room.
Ladybug sheets! (from Target)

There's still a few things that need to be done before I'm calling the room complete, but it's working out well for her right now, so I have time to work on the other things.  First, and most importantly, finish the ceiling fan.  We got it 95% of the way up, and the electrical box started wiggling around, so now D.Soup has to climb up in the attic to fit that back against the beam.  I was also trying to paint the blades to match the room, and I messed them up, so I have to fix them before they can go up.  Secondly, hang some paper lanterns above the bed.  Third, the curtains.  They should be easy, I just have to find some one on one time with the sewing machine.


She loves her room, and that makes me happy.

Thursday, August 14, 2014

Migrating

So this post is from 6 months ago. There is too much that has happened between now and then, so I'm just going to post it as is...........

2/5/14

I've spent the last few weeks slowly getting everything situated in my new craft room.  I miraculously "finished" sorting and boxing up all the millions of baby clothes that had littered the floor in that room for months.  Then I promptly found MORE clothes that needed a home. 

Sigh. 

It never ends.  Those clothes are currently stacked on top of the mountain of boxes, because there is no more space for them in said boxes.  Of course.

Once that was done, I had a whole new world of space open to me.  I have a few of these tables hanging out in my garage, for parties and whatnot.  I figured I could just use two of them and make a nice long wall of just table space.  Previously, I had everything in my craft room set up on one of them, and the Silhouette and sewing machine had to share space.  It was not really working for me.  Especially considering I don't clean up ever the other things that have taken up space on the table over the last few months.

I had D.Soup lug one of the extra tables upstairs and we set it up.  Then we decided to measure to see if two would fit.  The wall is just over 11.5 feet long, the tables we had were 6 feet each.  So putting two in that space was not an option.  The next idea we had was to buy one 5 foot table.  But the width of the tables is different, so that would have driven me insane.

So I bought two 5 foot tables at Sam's Club (because they had them for the cheapest price).  Now I have separate areas for my sewing machine, and my Silhouette.  And I have a the perfect size gap between the tables and the wall for a tall storage cabinet!  I'm so excited!  We've got the plans all set out for how it's going to get built, just need to find the time.  Considering we still haven't finished the other nightstand, we'll see when it actually happens.

The plan is to build the cabinet with enough storage spaces for each color family of paper to have its own space.  I'll also have a bunch of extra space underneath for anything else I want to put down there!  Compared to where my paper has been stored in the past (all over the floor), it's going to be AMAZING!

I also cleared out the closet in that room in preparation for all my fabric.  The goal is to put a shelf in there and have the fabric stored neatly on the shelf.  Again, compared to where it was before (all over the floor... are we seeing a pattern here?) its going to be like heaven.

But, more importantly.  The goal here is to get everything cleared out of what is to be L.Soup's new room.  Progress is slow, but its happening!  All of my big craft stuff has been transferred, next up is the actual office supplies.  During this migration, we are downsizing.  We hardly used the computers that we had set up in the old craft/computer room.  One of the two has been moved to the new craft room, because I use it for my crafting.  The other one is most likely headed for the basement.  D. Soup sometimes does crazy workout video things, and could use it for those.

This also means that the actual computer desk is no longer necessary.  We're probably never going to need it again, so we'll pack it up and save it for whenever we decide to yard sale.  Or something.  After that is gone, its really just finding new homes for all the small stuff in my new craft room.  Simple.  Yeah.  Right?

Well, we're going to take our time, and slowly shuffle through the mess.  But I feel like we're on the right track for moving L.Soup.  I have the plan for her bedroom in my head, and I can't wait to start working on it.  I have so many things that I need to get together for her space.

I feel a little in between a rock and a hard place in this moment.  I want to get L.Soup's room finished before the baby gets here.  But I need to get the craft room organized in order to get things ready for L.Soup's room. Not that my old craft room was organized in any way.  I think it's just that now I know what I want, but I have to choose one room over the other.

Of course I'm going to choose L.Soup's room.

But the picture of my craft room in my head is soooo beautiful.

Thursday, January 30, 2014

Shelf support and storage!

  1. Find antique TV stand and refinish it.
  2. Build bed frame.
  3. Build matching night stands.
  4. Refinish dining room table.
  5. Refinish bedroom furniture to match bed and night stands.
  6. Build computer desk for D.Soup.
  7. Refinish wing back chair.
  8. Build floating shelves.
  9. Build outdoor planters.
  10. Install cabinets with clothes folding space into laundry room, with cat door.
  11. Paint L.Soup's bedroom.
  12. Paint foyer.
  13. Sew pillow for L.Soup's bedroom.


After getting the shelves put into the laundry room, we knew we needed to get a support underneath the larger shelf between the washer and dryer, because it wasn't completely stable and the boards would start sagging otherwise.  Originally, it was just going to be a bracket type of support, but as we continued to think about it, we realized there was enough space there for some storage as well.

Of course I love storage, so I was all in for that plan.

Once we decided on that, D.Soup couldn't think about anything else.  So a few nights later after L.Soup was in bed, we mosied down to the basement and got to work.  The plan came from D.Soup's brain, and we're not master pattern makers or anything, so it's not a finished piece by any means.   But it will be perfect for between the two machines.

We knew the height to the bottom of the shelf was 37", and the space between the two machines was 13".  We had some spare 2x4's hanging around that would be the perfect skeleton...

Testing out the Kreg Jig.


We wanted to do a trial run on the Kreg Jig before my bedside table building session, and I also didn't want to be able to see any screws in the finished product.  After a few rounds of listening to D.Soup grumble about not understanding what he was supposed to be doing, I found a "how to use the Kreg Jig" instruction blog post.  Things seemed to go much more smoothly after that.

One side
Box Shape
Leveling out the last piece

We didn't have any plywood, so we picked some up the next day when we took our trip to the hardware store.  Unfortunately, D.Soup didn't account for the width of the plywood when measuring for size, so there is no space to put outside walls up that we had intended on doing.  I'm planning on getting baskets to use for storing things anyway, so the walls probably aren't completely necessary.

All done!
The more I look at it, the more I think we should have put the front 2x4 in the middle the other way, to allow that bottom shelf to have a little more space in the front.  It's easily fixable, but we'll see if it actually happens.

A few days later, we decided to put the cat door in, and finish up all the goals for the laundry room right now.  I sat on the floor in the hallway with my hands over L.Soup's ears while D.Soup cut a hole in the bottom of the door.  She's basically terrified of anything that makes a loud noise (except herself).  So whenever possible I try to let her experience loud noises from the protection of my (or her father's) arms.  It seems to be helping her get more and more brave around things she shouldn't be scared of.  Like a screwdriver.  Or the vacuum.

Bonus!


I'm so happy things are getting done around here.

Tuesday, January 28, 2014

Building with friends

  1. Find antique TV stand and refinish it.
  2. Build bed frame.
  3. Build matching night stands.
  4. Refinish dining room table.
  5. Refinish bedroom furniture to match bed and night stands.
  6. Build computer desk for D.Soup.
  7. Refinish wing back chair.
  8. Build floating shelves.
  9. Build outdoor planters.
  10. Install cabinets with clothes folding space into laundry room, with cat door.
  11. Paint L.Soup's bedroom.
  12. Paint foyer.
  13. Sew pillow for L.Soup's bedroom.

Our bedroom has basically been the most ignored room in our house since we moved in.  There are so many plans that I have for this room, but we just haven't made the time to work on them.  It's a beautiful sized room, but we have filled it with things that are not exactly screaming bedroom sanctuary.

Originally, I had a whole description of the room written here.  But it was confusing and I kept forgetting to include the pictures that would help it make more sense, so I'll do a before and after soon.

But, until then....

We need night stands.  Badly.  I can't have the baby sleeping in the co-sleeper with my jewelry and the monitor for L.Soup and my phone all hanging out in there with her.  I also need the room to start looking more like a place that adults sleep, and less like a college dorm room.

My friend and I made a deal that if she helps me build these, I'll help her build an entertainment center in a few months when it's warmer.  So the plans were made, and a few weekends ago it was happening...

When mom takes too long putting the cart together, dad decides where we ride.

D. Soup and I made our way to the hardware store on Saturday, and Sunday was the day!  They were finally getting done!  She got to my house around 10, and we hung out for a little while and then got to work.  We got through the cutting part pretty quickly and efficiently.  This was the part I was more worried about, but apparently my friend was 100% confident in our cutting abilities.  We actually did much better than I expected, considering D. Soup never lets me cut anything.

All our wood cut up
The next step was assembly.  I was far more confident on this part, because I know how to use a drill and hammer.  We hit a few snags when instructions weren't completely clear, or when we discovered that our assistant (my friends mom) had not provided us with all the cuts we needed, so we had to steal a few pieces from the pile for the second night stand.  Not a huge deal, but it was confusing for a little while.

We also used the Kreg Jig to connect most of the pieces together, which took a bit of a learning curve.  But we got it figured out eventually.  It's actually really awesome!

Halfway there!
The other issue we ran into was the pine 2x2's we were working with were warped.  The nice wood in the lumber section at the hardware store was only available in 3 foot sections for 2x2's, and I was NOT paying $5.50 for a 3 foot section, especially when I needed 13 of them.  No thanks.

Luckily D.Soup found 8 foot pine 2x2's in another section, but they aren't as nice as the other materials.  Not a huge deal because I can easily sand them down to look nice.  The biggest issue was the warping, like I said.  It caused us a little trouble when putting the front bottom piece on.  It actually pulled the screw out of the board directly under the drawer.  We had to cut another board for that section that was a little longer and replace it so that it stayed attached.  That was frustrating.

For full disclosure:  We also had a slight mishap with the top boards.  We tried clamping all 3 pieces together and then screwing them together, and that caused the top piece to curve in the center.  I think I'm going to take it back apart and try again so that its more even across the top.

But in all honesty, you can hardly tell anything is wrong with it unless you are very seriously inspecting it.

Finished (unfinished) product!
I'm so happy with how it turned out.  Everyone was super impressed (and surprised... thanks a lot) at how good of a job we did, considering we don't use power tools very often.  Unfortunately we only got one done, because we had a few minor delays and we had to stop for eating and for babies and things of that nature.

The other one is in the works still, it's been a busy few weeks.  I'm hoping that it will get done soon so we will have a matching set.


I love mine already.

Tuesday, January 21, 2014

Another shelf for the laundry room!

We are trying to plan our evenings so we efficiently get things done throughout the week.  Instead of making a huge list for the week and trying to do too many things at one time, we make a short list each day of things we would like to accomplish before heading to bed.  For example, Wednesday's list was: 
  1. wash 1 load of  laundry
  2. put away all clean laundry
  3. take measurements in bedroom
  4. measure space for counter in laundry room
  5. bring laundry basket from landing upstairs
Laundry is pretty much a constant on the list, and we never seem to get around to putting it all away.  Like on Wednesday.  We ended up working later than we expected, so by the time we got home and ate, it was too late to put any of L.Soup's clothes away before putting her to bed.  Which was unfortunate, considering most of the laundry that hasn't been put away at the moment belongs to her.  I think there are currently 2.5 baskets sitting around our house dedicated to her stuff.

So obviously #2 on the list didn't happen.  But we did get one full load of our laundry done and put away, along with another load that was waiting to be put away.  (#2 got moved over to Thursday's list, and we actually got all of L.Soup's clothes dealt with before bed time.  So that's progress!)

While I was reading to L.Soup, I heard D.Soup doing some measuring.  So I figured he was getting #4 done.  #3 was my job, since I'm measuring for the nightstands my friend and I are building on Sunday (!!).  As I was putting L.Soup into her crib, I heard the saw running.  So did my girl.  So that jacked up our whole night time routine, since we had to talk about daddy being NOISY a million times before she would settle down.

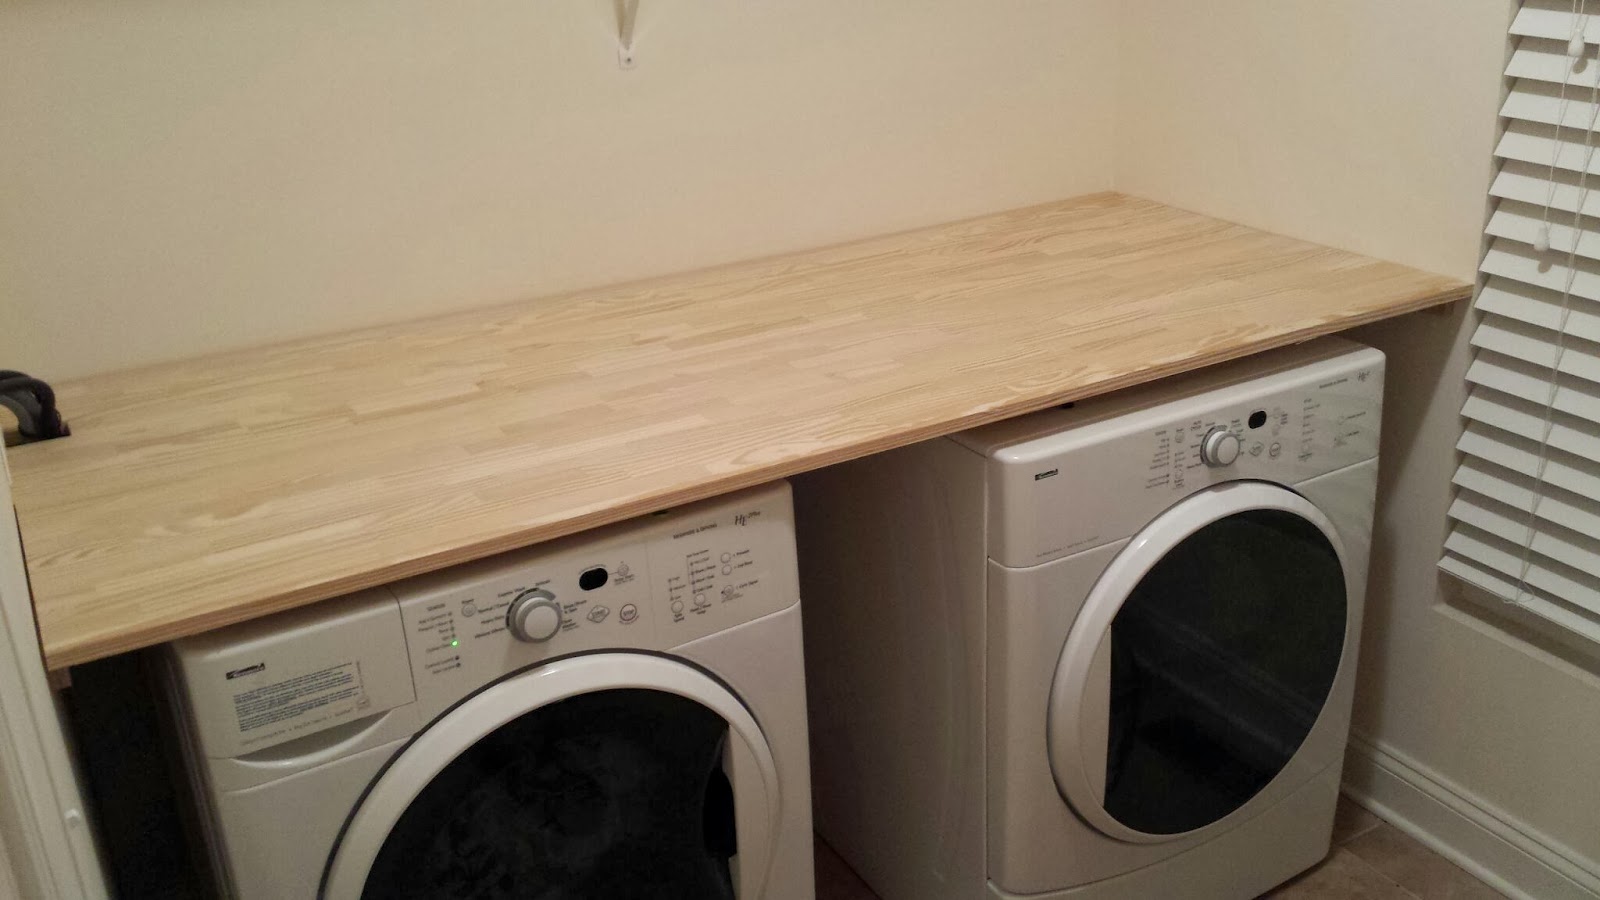
So we over achieved on one step of our to do list, which took away from a few other parts.  But it means that the big shelf in the laundry room is done!  We added a leg to the other shelf, but its covered in stuff and ugly so I didn't take a picture of it.  For this shelf, we used two longer sections of ready to stain panels similar to this.  We only needed about 77 inches of actual board, but the options were 96 or 72, so we had to go for the longer pieces and cut them down.  Unfortunately, as we discovered last time, the walls are not square, so it called for some special measuring that I did not get to be a part of, since someone didn't want to wait until I was done with the bedtime routine.  No big deal, he did a spectacular job without me and didn't even have to go back for a second round of cutting.

He had to notch out a section for the tubes that run to the back of the washing machine, you can see them on the left hand side of the picture below.  A little stain and a little molding around the edges and these shelves are done!  I can't stain while I'm pregnant, but D.Soup said he's all over it, so it can actually get done soon!  Woo!

It's so beautiful.
I have been using Country Save liquid detergent for the last two years.  I really like it, and the fact that my clothes don't have any specific scent to them anymore.  D.Soup decided he wanted something that was specifically HE, so we switched over to the powdered version to give it a try.  Which means I now get to display it in a pretty glass jar on top of the new counter!

My new laundry detergent container!
It also means that I shouldn't have to buy laundry detergent for another 4 years.  We've been using the same 4 bottles I purchased in March 2012, and we're almost done the last bottle.  That's including some leakage we had due to one of the bottles having a crack in the bottom.

The powder came in another pack of 4, but each box is supposed to cover 160 loads of laundry.  Amazing.
 
To round things out, I also got a little trash can to stuff all the dryer lint into.  This is a step up for me considering before we were just piling it on top of the dryer until it got out of hand.  Which was frequently.
New little trash can for lint!
After taking these pictures, I emptied out a laundry basket and sat it on top.  There's still so much room!  I love it so much.

The laundry room work is probably going to go on hiatus pretty soon, in lieu of the attic stairs.  I'm going to try to get the curtains up while D.Soup is working on other things, so if that happens there will be another laundry room post.


I'm just happy to have this much done this quickly.

Thursday, January 16, 2014

Pillows!

I have a few pillows that I've been wanting to put back into my living room.  I could have easily used the current cases, which matched perfectly in the living room at our old house, until I had time to redo the whole living room to make everything match...

Unfortunately, they all look like this:

Damn puppy teeth!
Every corner on every.single.pillow.  Adult Calli is lucky that Puppy Calli was so cute.

So, a few months ago, I bought fabric to make some new pillow cases.  My vision for the new living room is blue accents, which will match the shades of blue I hope to paint the furniture sometime in the (far distant) future.  These are two of the fabrics I ended up choosing:
I originally picked out three fabrics, because I was absolutely sure that I had 6 pillows.  But apparently that was WRONG, because I can only find 4 pillows total.  I might just leave it at that, and use the other fabric for something else.  I'm going to let the pillows settle in over the next few days before I decide.

I asked for a yard of each fabric, and I'm not sure if the cuts were off or if they shrank that much when I put the fabric through the drier, but both sheets were much shorter than I expected them to be.  Unfortunately, the pillows were also slightly larger than I expected them to be too.  Pillow inserts available for purchase at the fabric store are approximately 16" square.  These inserts came with the cases, and ended up being 17.5" square.  So I was cutting it pretty close (no pun intended) when I was measuring everything out.

I followed the measurement guidelines from MADE on how to sew a slipcover for a pillow (second half of the video).
Front
Back.
Overall I'm very happy with how they turned out.  If you want to get into sewing, pillows are a good place to start.  Four straight lines is the easiest thing I've ever sewn.

I've noticed a few times that you can see the insert along the opening on the back of the pillow.  So apparently some of the cases are a little snug.  I'm sure it will work itself out.
Not sure what's going on with the weird coloring here...
I obviously need to stop taking pictures with my cell phone.


The fronts sure look pretty though.

Monday, January 13, 2014

All the crap that needs to get done

We have a LOT of things that needs to happen before the baby gets here.  Well, technically before the baby is ready to move out of the co-sleeper.  So that buys us a few more months.  Luckily.

The plan is to move L.Soup into what is currently the computer/craft room.  Preferably before we are ready to move the baby into the nursery.  That means we have to move all the of disastrous mess stuff from that room into the other spare room above the garage. 

I wish that we could just move her into that room, and not have to shift all the rooms around, but I'm worried that if one of us has to run out after L.Soup is already in bed for the night, the noise from the garage door opening is going to wake her up.  Its fairly loud when you're in that room and the garage door is moving.  So that idea got nixed.

THAT room is currently full of about 8 million baby clothes.  I wish I was exaggerating.  My dearest sister dumped gifted all of her kids clothes to us when they were done with them.  I've spent the last few months slowly going through the 22 trash bags that arrived at our house and organizing them into large storage boxes.  I'm almost done.  Once I found out we were having a girl, I focused more on finishing up that stuff so it was well organized and mixed with what I had from L.Soup.  The boy stuff has kind of been brushed to the side and I need to focus back on finishing that up.

Once all the clothes are actually organized, they need to be moved up to the attic.  At least all the boy stuff.  Some of the girl stuff can stay down and get put out in prep for our new girls arrival in April.  Before anything can go up into the attic, we need stairs to the attic.  The builder grade attic access (which is in our closet) is a joke.  Even if the floor of our closet wasn't covered in shoes (whoops) the hole is just big enough for an adult to shimmy through, there's absolutely no way any kind of storage box is fitting through it.

We are looking into something like this.  D.Soup still has to get up in the attic and make sure it's possible place everything where we want, but if so we will have ladder access in the hallway heading into the laundry room.

Let's recap:

  1. Cut gaping hole in ceiling.
  2. Replace gaping hole with attic stairs.
  3. Create flooring in attic.
  4. Finish organizing 8 million baby clothes.
  5. Move boxes of baby clothes into attic.
  6. Clean out room over garage completely.
  7. Move computer/craft room into newly cleaned out room.
  8. Create awesome new room for L.Soup.
  9. Move L.Soup into awesome new room.
  10. Move baby into nursery.
All before October (ish)?  With a 2 year old and a newborn.  Cake.

Ha.

So obviously, once the shelves are finished in the laundry room, that project is getting put on hold for a little while so we can focus on some of these steps.


Help.

Thursday, January 2, 2014

Next Project

  1. Find antique TV stand and refinish it.
  2. Build bed frame.
  3. Build matching night stands.
  4. Refinish dining room table.
  5. Refinish bedroom furniture to match bed and night stands.
  6. Build computer desk for D.Soup.
  7. Refinish wing back chair.
  8. Build floating shelves.
  9. Build outdoor planters.
  10. Install cabinets with clothes folding space into laundry room, with cat door.
  11. Paint L.Soup's bedroom.
  12. Paint foyer.
  13. Sew pillow for L.Soup's bedroom. 

First and most importantly:
Happy New Year!!


I'm so happy my energy, willpower and motivation are back!  I'm ready to get back to work on the house.  Especially now that the foyer is done! Woo!  I don't have to feel guilty starting a new project when that's still sitting around sadly.

D.Soup and I decided that for Christmas this year we would work on getting some of the stuff in the house dealt with, instead of buying each other presents.  We have a lot of plans for this house, and haven't made much time to get anything done (obviously, see list above). 

For the last our laundry room has been a wealth of unused space.  We threw the washer and dryer in there, along with any laundry and cleaning supplies would fit up on the single wire shelf that came pre-installed.  We also hid the cat's litter box in there.
Hate this mess.

Of course I waited until the work started to take pictures.


Gross

It's a mess.  There's litter all over the floor (gross).  I can hardly reach any of the stuff on the shelf.  There's no where to deal with the clothes once they are finished in the dryer, which means they end up piled up in our room until we deal with them.
 
Originally our plan was to purchase a ready to finish cabinet to put in the open space and hide the litter box inside, and a cat door for them to have access to it.  My only worry was that the prefabbed cabinets would be too small for the litter box that we have. 


As I was perusing the internet one day, I came across this.  I immediately knew that this would be such a better route for us, and sent it to D.Soup to look over.  Now the plan is to have two counter tops, one over the washer and dryer, and one in the opposite corner over the litter box.  That counter will get the curtain treatment, to hide what happens in the litter box from sight.  

The other change is that the laundry room door will be getting a cat door on it.  That way it can stay closed all the time.  L.Soup will be moving to the room closest to the laundry room within the year, and I don't want any late night laundry running to keep her awake.  Having the ability to close the door completely should help with the noise problem.

Another addition to this room will be wall cabinets!  I hate wire shelves, especially ones that are way to high for my short self to reach without excessive stretching.  A set will go over the washer and dryer, and another over the cat box.  Storage everywhere!

I found this great stencil that I also have big plans for. I ordered it, along with a stencil brush and can't wait for it to arrive!  

We got started putting the braces up for the two shelves while we were off work after New Years.  We discovered L.Soup is NOT a fan of the drill.  She threw an absolute fit every time it started up.  That was fun.  So far this is our progress:
First board up!  Another one runs down the wall on the right, but I forgot to take a picture.
After we got the two boards up for this corner, D.Soup grabbed the actual shelf piece, so we could see how it looked.  He sat it on the brace, and said "Well, good news and bad news..."

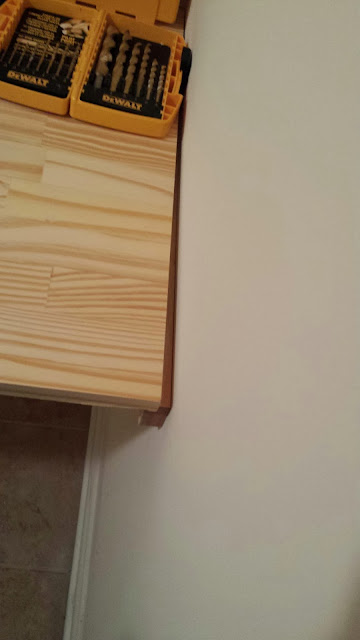
Good news, is it fits... Bad news, our room isn't square!  What the heck!  So it looks like this:
Rude.
We are going to get some trim and cover that mess up...Then we have to figure out what we're using for a leg on the side that's not butted up against a wall.  That's on my to do list.

We came across the same issue with the other walls too.  Above the front of the washer and dryer, the distance between the walls measures 76.75", but in the corners it measures 76.25"!  That was fun for D.Soup, who cut the board you see below at 76.75" while in the basement.  He then had to run the stairs 4 times to get it cut the correct length.  He was planning on just cutting and eighth of an inch each time, then wised up after the third trip down two flights of stairs and measured the distance between the walls in the corner.
 
Boards up around the washer and dryer!
Next step is to cut the boards for the top so they fit around the tubing you see on the left hand side.  We also now have to take into consideration the change in distance and make sure to cut the boards on a slight angle so we don't have another huge gap.

I bought a little flip top trash can to go on top of the counter over the washer and dryer for dryer lint, which is much better than it just sitting on top of the dryer like it normally does (as you can see in a few of the pictures).  I also bought a glass canister to put my new powdered laundry detergent in.  I've never used powdered before, but I like the brand (I've used the liquid for the last 2 years) and it should last FOREVER, since I bought this.  So now I have a pretty place to store it.

Obviously I'm pretty excited about this getting done so quickly.

The cabinet part of this deal might not happen as fast, but I'm okay with that.  We decided to use these plans from Ana White and build our own cabinets:
We'll need 2 of each of the wall cabinets, and 1 base cabinet to squeeze in between the washer and dryer.  To purchase the cabinets that we need, it would cost us well over $400.  If we build our own, it will cost us around $200 according to my calculations.  Making them ourselves also allows us to tweak the sizes slightly so they fit perfectly in the spaces.  Also, I'm completely okay with it taking a little longer to save that much money.


Heck, I'm still sleeping on a mattress on the floor.
So obviously I don't mind waiting,
and not paying out the wazoo for something.